How to Add A Custom Text Field on Your Shopify Product Page

The custom text field has been a useful feature. It offers easy customer input collection while reducing manual follow-ups. So, how can you implement such a powerful customization tool in your own store? In this article, we will walk you through the two primary methods for how to add custom text field on Shopify product page in detail.
How To Add Custom Text Field on Shopify Product Pages Without Apps
With this method, you will be adding custom text fields on the product pages by yourself. The main approach is using Shopify’s line item properties to collect custom input. If you’re unfamiliar, line item properties are custom form fields that let visitors fill in extra information. One can include notes, names, or special requests, and such information will then appear in the order details at checkout.
The key benefit of this method is that it’s built-in and flexible. Other than textboxes, you can even add dropdowns and checkboxes all at once. However, it’s important to note that this method involves editing the theme code and manual configuration. Otherwise, the inputs won’t display in the cart or email notifications.
Below is a step-by-step guide for the default Dawn theme.
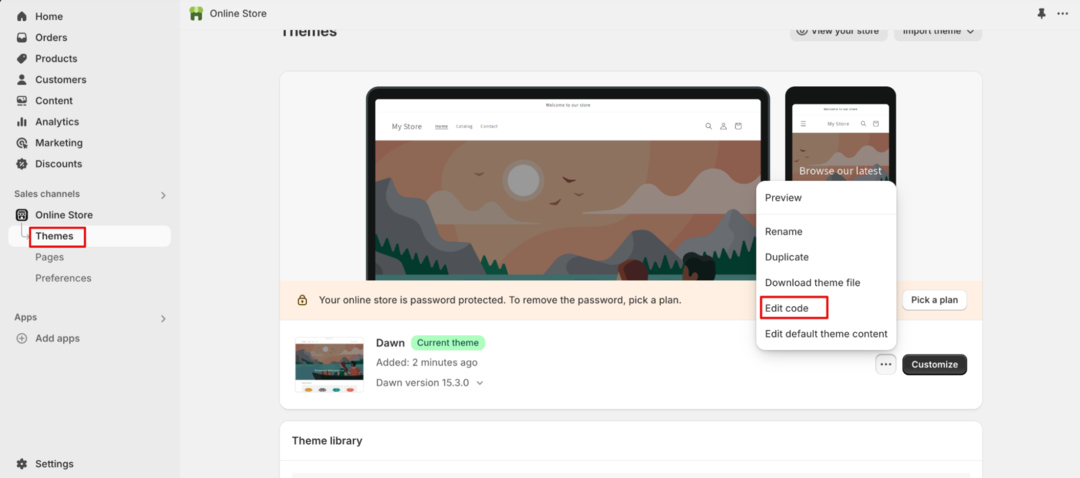
Step 1: Access the theme editor
- From your Shopify admin, go to the Online Store section under the Sales channels.
- There, you will see the Themes option.
- Click on the (…) next to the Customize button in the Themes interface.
- Then select Edit code.
>> 100+ Best Shopify Themes Collection For Each Store Model
Step 2: Locate the product form in the appropriate Liquid file
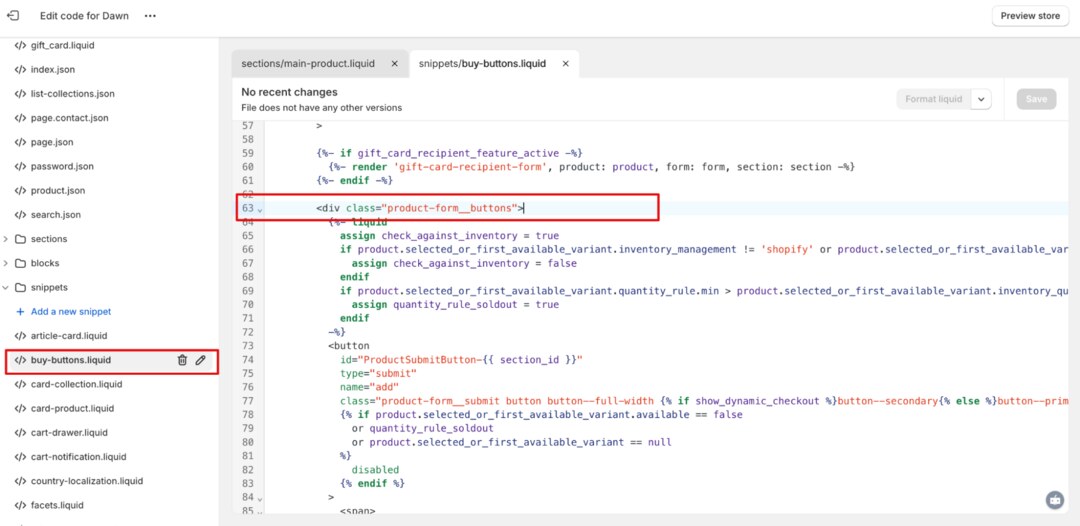
- Click on the snippets folder on the top right menu.
- Scroll down, find and open the buy-buttons.liquid file.
- Navigate to the <div class=”product-form__buttons”> line. Normally it’s around row 63.
Step 3: Insert the custom text field code snippet
Copy and paste the following code right above the line.
<label for=”additional-text” class=”form__label”>Additional Text</label>
<input type=”text” id=”additional-text” name=”properties[Additional Text]”>
In case you want to add other input types like dropdowns, checkboxes, or file uploads, you can look up Shopify’s line item properties documentation.
Step 4: Save and preview your changes
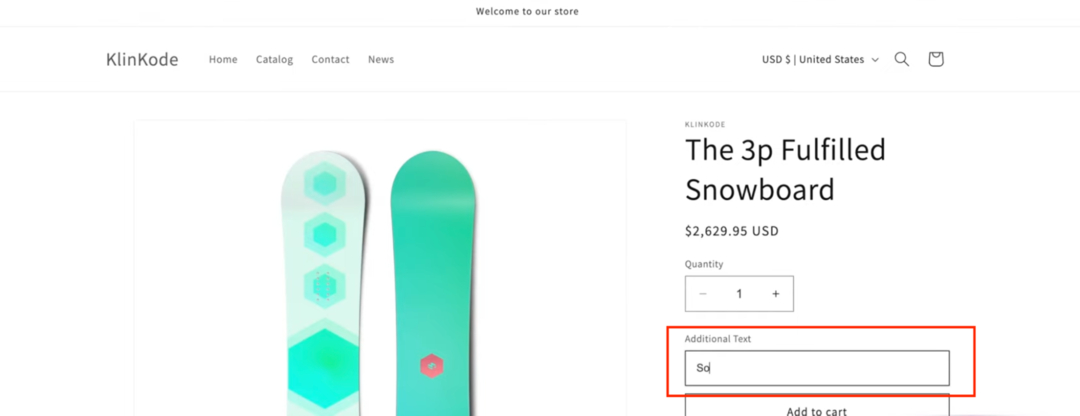
Click Save. Then use the theme preview to check if the input field shows up correctly on the product page.
Step 5: Test the custom text field functionality
- Go to the live product page and enter your notes. Add the item to the cart to test the function out.
- Now, visit the cart page to confirm the input appears.
>> You may concern: How to Remove Shop Pay From Shopify Product Page
Adding Custom Text Fields To Shopify Using Shopify Apps
Another way to add custom text fields on Shopify product pages is to install third-party product options. Basically, you go to the Shopify App Store, find a compatible plugin, and add it to your store. These apps then provide drag-and-drop interfaces to insert custom input fields.
With this method, you can steer clear of the cons of manual theme editing, which requires coding knowledge. It also helps manage multiple product options across different SKUs with ease. The downside, however, is that most apps are paid or freemium. The addition of plugins is also commonly considered a factor that may slow down page speed.
When choosing a product options app, try to look for
- Multiple field types (text, dropdown, checkbox, upload)
- Clean UI and mobile compatibility
- Easy integration with existing themes
- Cart and email compatibility for custom input
- Customization options
The following list includes some of the best Shopify apps for adding custom text fields:
OPTIS Product Options
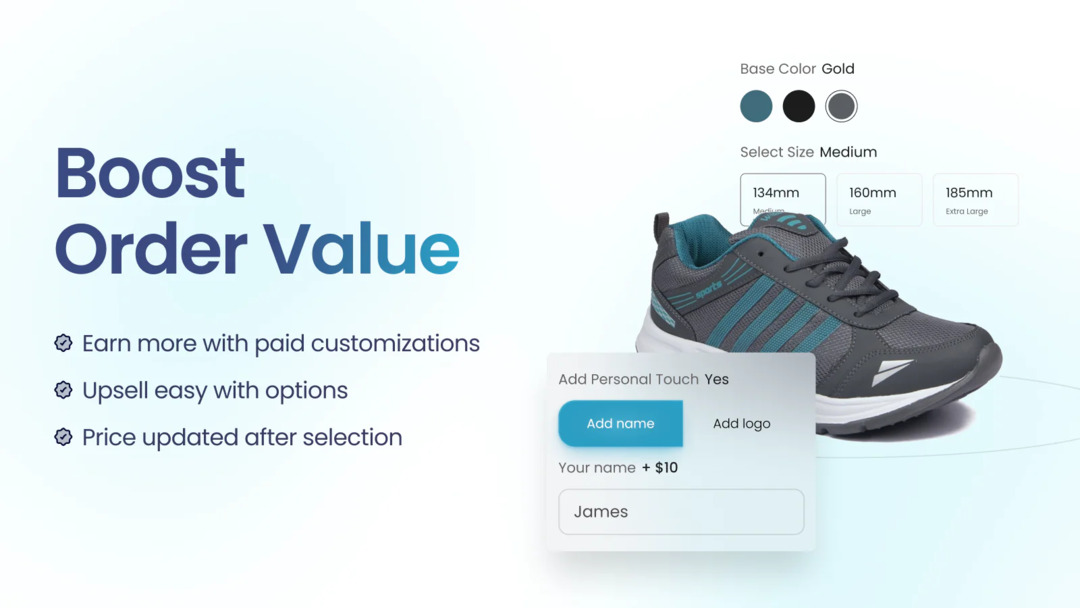
Developed by BSS Commerce, OPTIS Product Options stands out with its highly customizable text box feature. You can limit character count, set placeholders, and apply input validation. In addition to that is setting rules for dynamic pricing. You can add price surcharges based on customer selections or entered values.
Besides text boxes, OPTIS supports other option types, such as dropdowns, checkboxes, radio buttons, date pickers, and uploads. There are also options to show or hide product options and make changes to the cart page based on customer selections.
Features:
- 18+ option types, including text, upload, swatch, and more
- Fully customizable text fields with validation
- Conditional logic based on customer choices
- Edit cart page display of custom inputs
- Bulk apply options across multiple products
Pricing:
- Free
- Advanced: $9.99/month
- Platinum: $19.99/month
- Unlimited: $49.99/month
Rating: 5.0/5⭐ based on 1,500+ ratings.
>> Read more: How to Add Video to Shopify Product Page in 4 Ways
Easify Product Options
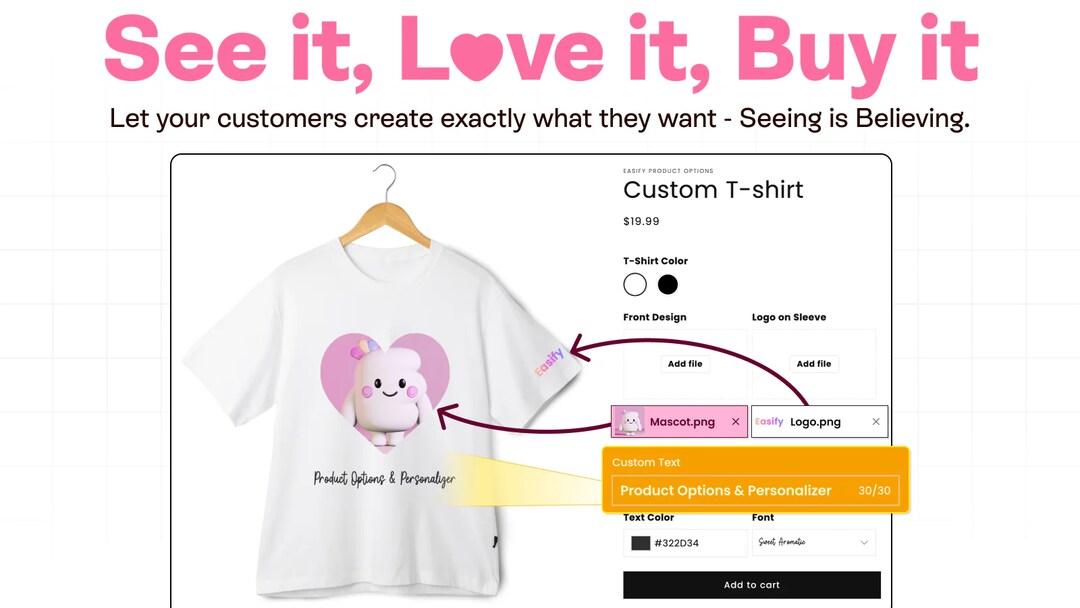
Easify makes it easy to create advanced custom fields. It lets merchants add text inputs, file uploads, and swatches – all without touching code. Among other notable features are conditional logic, option sets for bulk assignment, and a built-in price calculator based on selected options.
Features:
- 25+ input types, including text boxes, dropdowns, color swatches
- Conditional logic and dynamic field visibility
- Bulk apply options to multiple products
- Live preview of custom fields for customers
Pricing:
- Free forever
- Pro Plan: $19.99/month
- Premium Plan: $19.99/month
Rating: 4.9/5⭐ based on 800+ ratings.
Textbox & Textfield by Textify

Textbox & Textfield is another app that you can use to add custom text field on Shopify product pages. In comparison with the more feature-heavy options like Easify or OPTIS, this one focuses on simplicity and performance. You can quickly add a single or multiple text fields without dealing with a complex setup or UI overload.
Features:
- Add one or more text fields to product pages
- Simple, lightweight setup with no coding required
- Works out-of-the-box with most Shopify themes
- Supports placeholder text and character limits
Pricing: $2.99/month
Rating: 5.0/5⭐ based on 100+ ratings.
Best Practices for Implementing Custom Text Fields
Below are some additional tips for making sure your custom text fields work just fine:
- Validating user input to prevent errors. You can test it out with character limits, required fields, or input patterns first.
- Styling the text field to match your store’s theme. You can learn some CSS and experiment directly in the base.css file in the assets folder within the code editing interface. In case you use an app, most apps offer built-in styling options or preset themes then.
- Testing the functionality across different devices and browsers. Make sure the custom input passed through to the cart and checkout.
- Communicating customization options clearly to customers. This can be done through clear labels, placeholder text, or adding short instructions in the product description.
Common Issues With Adding Custom Text To Shopify Product Page and How To Fix
Now you know how to add custom text field on Shopify product pages. While the methods can be straightforward, we’ve come across some frequently asked questions and common issues on Shopify forums and community threads. In this section, we’ll highlight those problems and offer simple fixes.
1. Custom text field not appearing on the product page
This is a common case when you put the code snippet outside the product form buttons. Another possible issue is that the code is inserted into the wrong file.
Re-check that you’ve added the field inside the buy-buttons.liquid file. The code must be placed right before the correct product form block.
2. Entered text not showing in the cart or order details
This case is often seen in themes that don’t include support for displaying line item properties by default. So, you need to update the main-cart-items.liquid file (or cart.liquid in older themes) in order to display custom properties.
Here’s a quick guide:
1 – Go to Online Store > Themes > … > Edit code.
2 – Open the main-cart-items.liquid file under the sections folder.
3 – Look for the existing loop that starts with {% for item in cart.items %}
4 – Paste this code inside the cart item loop, right before the first {% endif %}:
{% for p in item.properties %}
{% unless p.last == blank %}
<p>{{ p.first }}: {{ p.last }}</p>
{% endunless %}
{% endfor %}
5 – Save and test.
Final Thoughts
That concludes our guide on how to add custom text field on Shopify product page. In essence, there are two ways to do so. The first option is to add some code snippets to the theme, and the second one is to use a third-party app. Find this content helpful? Feel free to visit BSS Commerce for more Shopify tutorials, tools, and eCommerce insights.

Finn Nguyen
Finn is a Shopify expert with 5+ years of experience helping new business owners launch and grow online stores. Specializing in store setup, theme selection, and optimization, he provides practical guidance to turn ideas into successful eCommerce businesses