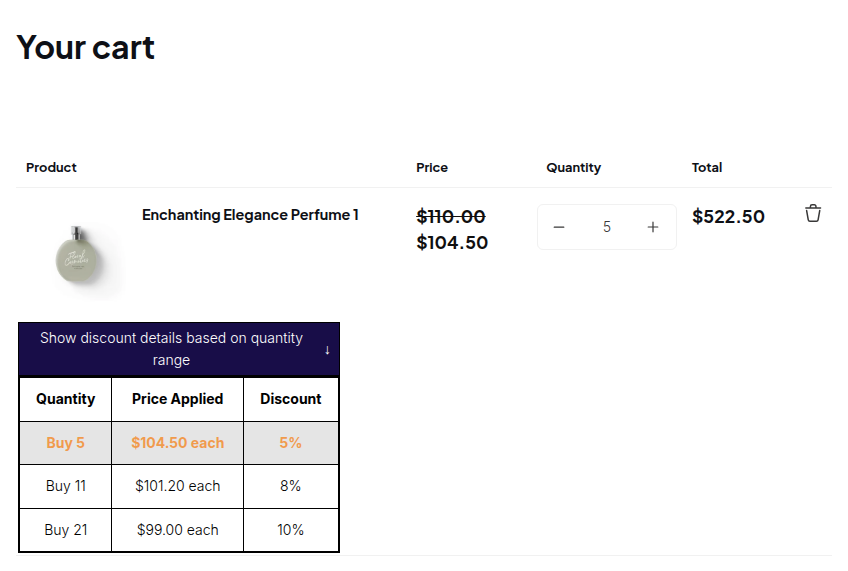
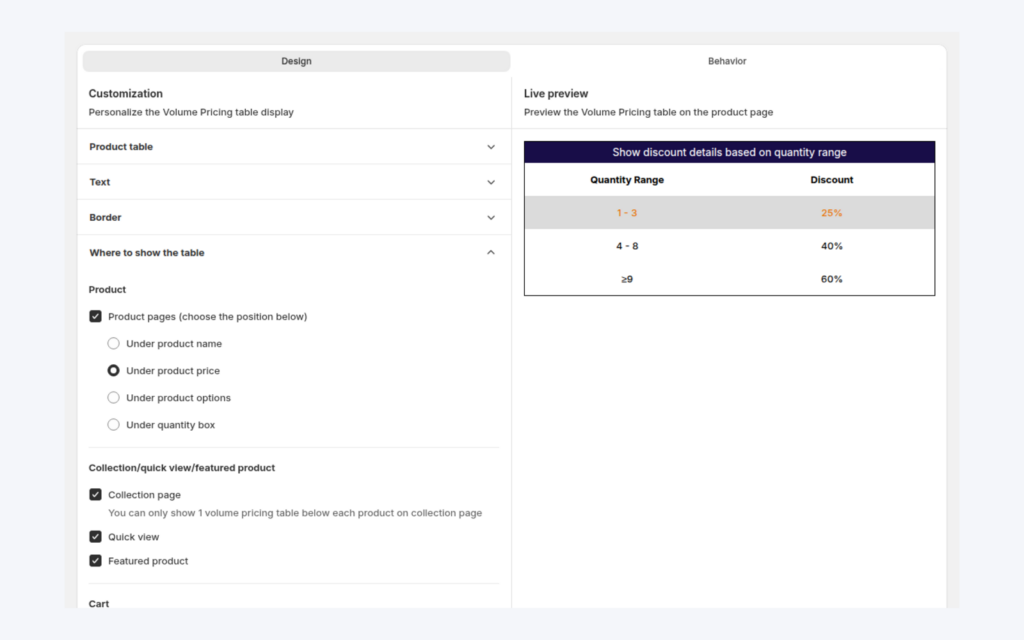
To show a volume pricing table on Shopify product pages, create a Volume Pricing rule in BSS B2B Solution, then open Volume Pricing > Settings and choose where the tier table appears. Product pages, the cart page and the mini cart are on by default, and collection pages, quick view and featured product sections can be switched on, all without editing your theme code.
A quantity discount only works when buyers can see it. If the discount lives in a price sheet or an email, most buyers add the minimum quantity and never learn that the next break is a few units away. The table puts the offer next to the quantity box, where the decision is made.
Who this is for
This setup is for you if:
- You already have quantity breaks, or you are about to create them, and you want buyers to see the tiers before they pick a quantity.
- Your products are bought in different sizes, packs or volumes, so the right break depends on the product.
- You want the same offer visible on the product page, the cart and, for quick comparison, collection pages.
- You sell in several languages and need the table labels to match the shopper’s language.
- You want to control the look of the table, and what a click on a row does, without a developer.
Why this matters
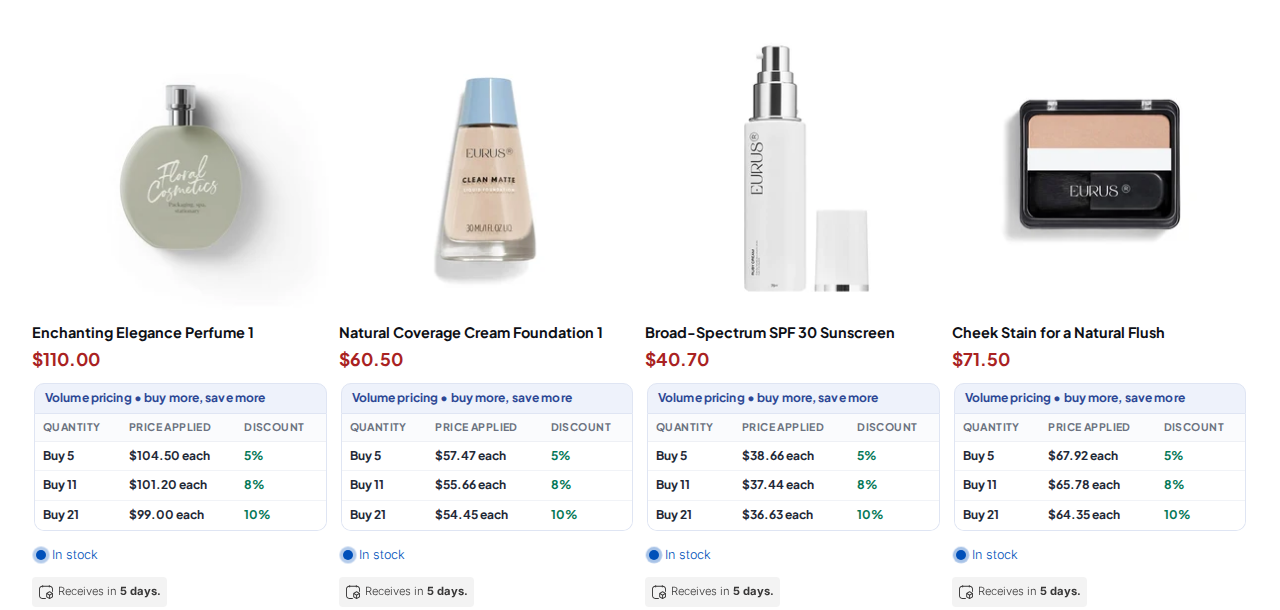
Placement decides impact. A table under the price on a product page is seen before the quantity is chosen. A table in the cart helps at the moment a buyer reviews the order and may add one more case to reach the next break. A compact table on a collection page lets buyers compare which products offer breaks before they open any of them.
Think of a plumbing-supplies wholesaler with hundreds of fittings. A buyer scanning a collection page does not want to open every product to find out whether a bulk price exists. A small table under each product answers the question at a glance, and the product page shows the full table with the quantity box next to it.
The table is also part of your design. If it clashes with the theme, buyers ignore it. The Design tab lets you match the style to your brand and preview the result before you save, so the table looks like part of the page rather than an add-on.
How to set up the table with BSS B2B Solution
Step 1: Make sure a rule exists
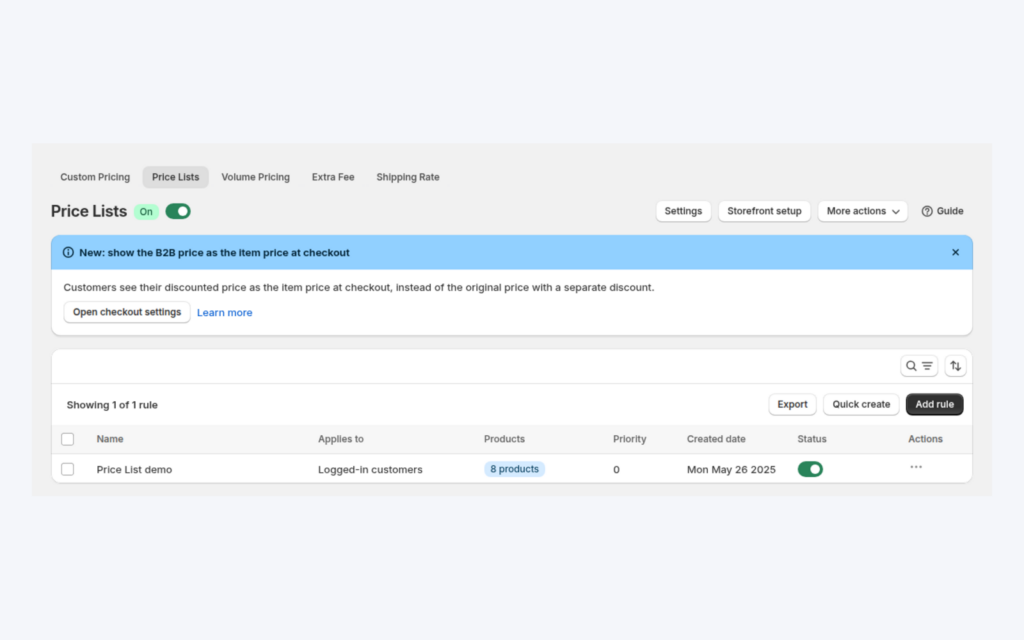
The table is drawn from your Volume Pricing rules, so create one first. Follow the tiered pricing use case if you have not set up tiers. The table only shows to customers who match a rule and only on the products the rule covers.
Step 2: Choose where the table shows
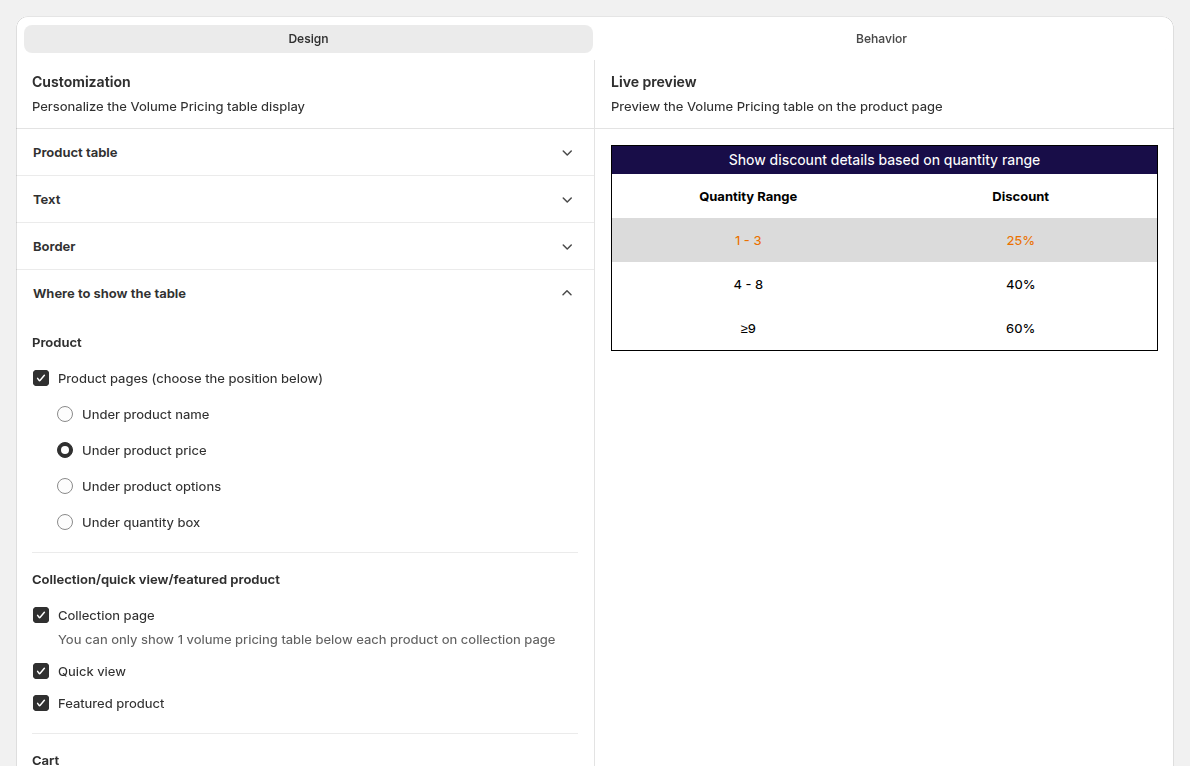
Open Volume Pricing > Settings. On the Design tab, open Where to show the table and tick the places you want. Product pages, the cart page and the mini cart are on by default. The collection page, quick view and featured product are off until you tick them. Only one table can show below each product on a collection page.
For product pages, choose the position: under the product name, under the product price (the default), under the product options or under the quantity box.
Step 3: Style the table
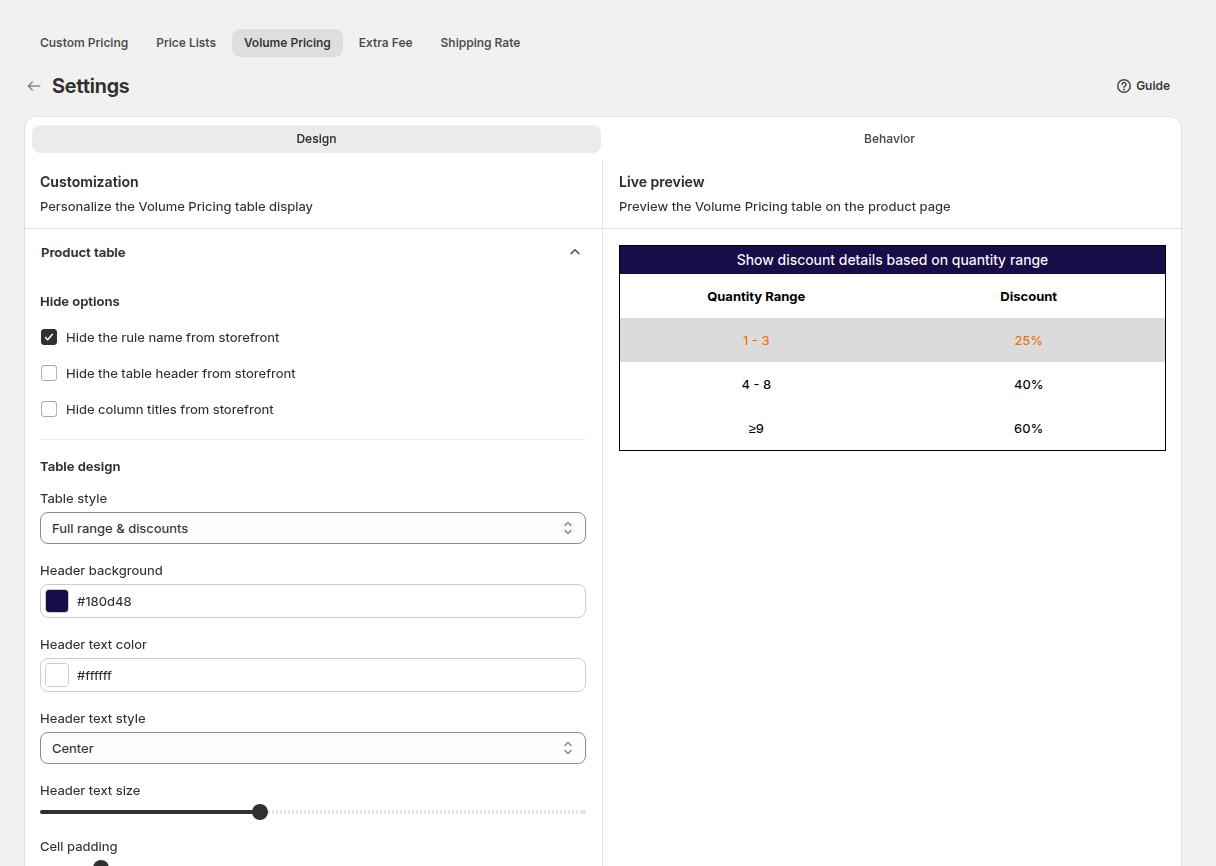
In the same tab, choose a table style, the text, the borders and the colours. The settings apply to all your Volume Pricing rules. A preview shows how the table will look, so you can compare positions and styles before you save.
Step 4: Choose what a click does
On the Behavior tab, Row click decides what happens when a customer clicks a row of the table. The default selects the maximum quantity of the range, and you can switch to the minimum. For a range of 3 to 5, minimum sets the quantity to 3 and maximum sets it to 5. The row that matches the quantity in the box is highlighted.
The same tab has Apply multiple rules to product pages and featured products. The default is No: each customer sees only the table of the rule that applies to them. Set it to Yes to show the tables of every matching rule on the product page.
Step 5: Translate the labels
If your store supports several languages, open More actions > Translations on the Volume Pricing page. The list shows the languages published in your Shopify admin, and text you leave blank falls back to your default language. The guide notes that default translations exist for the five most common languages.
Step 6: Check the storefront
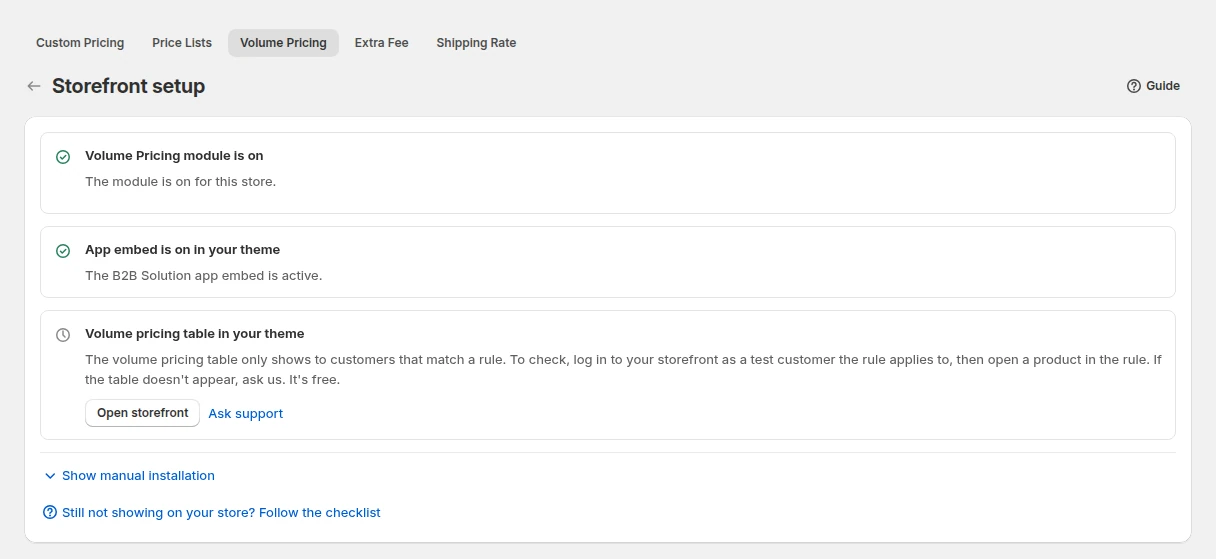
Click Storefront setup on the Volume Pricing page. It checks that the module and the app embed are on and links to your storefront. Then open a covered product as an eligible buyer, on desktop and on a phone, because tables with many ranges can need more room on a small screen.
What buyers see on the storefront
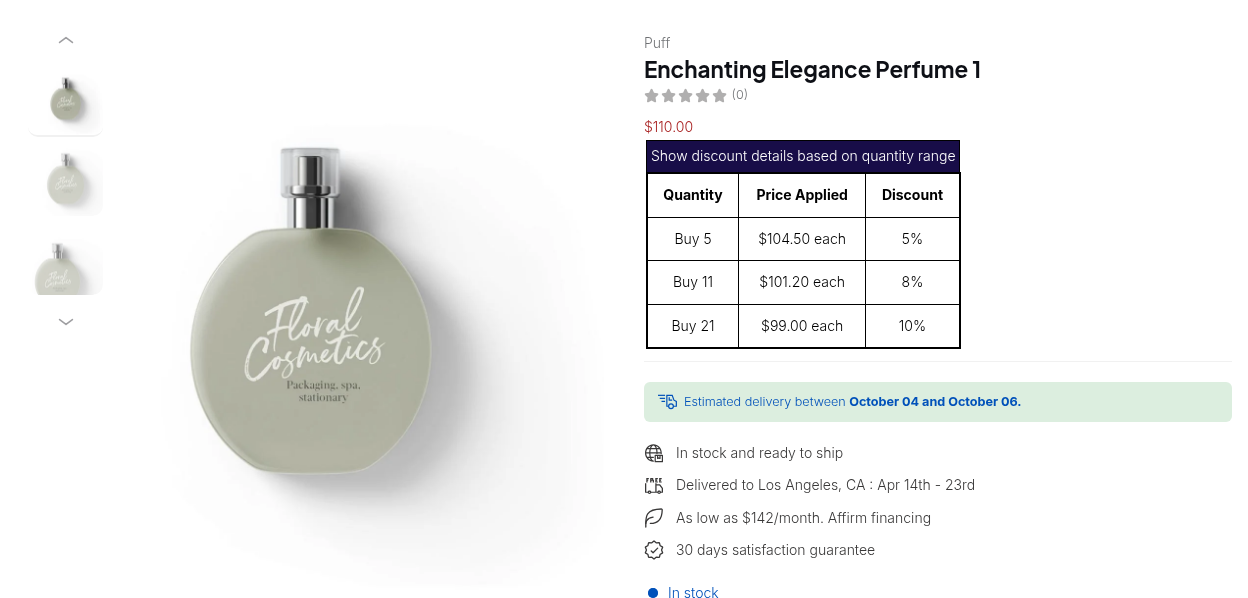
A buyer who matches the rule sees a table with one row for each range and the price or discount that range gives. When the quantity in the box reaches a range, the discounted price replaces the original price automatically, and the final tiered discount is applied in the cart and at checkout. If the same buyer also has a Price List or Custom Pricing price, the app applies that rule first and the tiers come on top of it, so the table always reflects the buyer’s own base price.
Buyers can click a range to set the quantity, which turns the table from information into a shortcut. On a phone, keep the number of ranges small: three or four rows read well, while a long table can push the Add to cart button far down the page. If your theme shows the table in an awkward place, change the position in Settings rather than editing the template.
Example: choosing where to show tiers
This is an illustration, not a customer result. A plumbing-supplies wholesaler has one rule for logged-in trade buyers: 10% off from 12 units, 15% off from 48 units, on selected fittings.
| Page | Setting | Why |
|---|---|---|
| Product page | On, under the quantity box | The buyer sees the breaks right where the number is typed. |
| Cart page and mini cart | On (default) | The buyer can add one more case to reach the next break. |
| Collection page | On | Compact table under each fitting for quick comparison. |
| Quick view | Off | The theme’s quick view is narrow, so the wholesaler leaves it off after testing. |
| Row click | Minimum quantity | Clicking the 48 row jumps the box to 48. |
A buyer who adds 14 fittings sees the 12 row highlighted. Clicking the 48 row sets 48 in the box. The cart shows the matched tier under the line item.
Works well with
- Building the tiers. Start from tiered quantity break pricing.
- A negotiated base price. Combine custom and volume pricing; the table reflects tiers on that price.
- Cart-level nudges. Enforce minimum order quantity and value with Order Limits when a break should also be a floor.
- Trade stores. See the electronics trade accounts setup for tiers in a catalog with many products.
The wholesale pricing hub collects the pricing guides. Useful glossary terms are volume pricing, quantity break and tiered pricing.
Limits and common mistakes
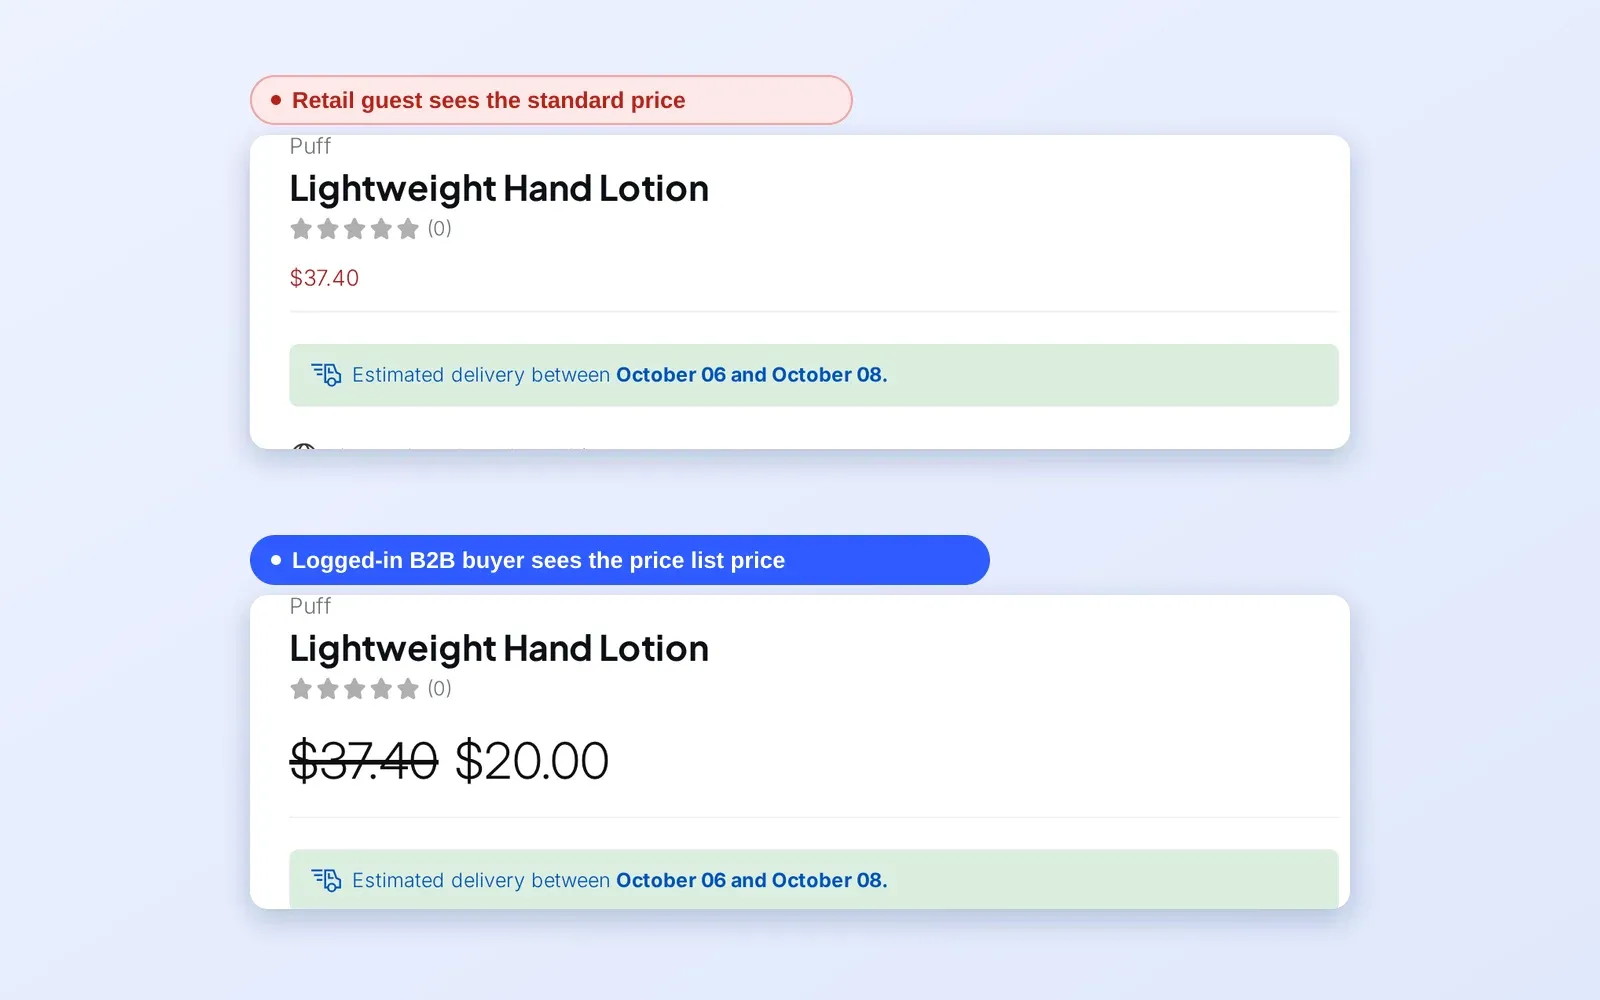
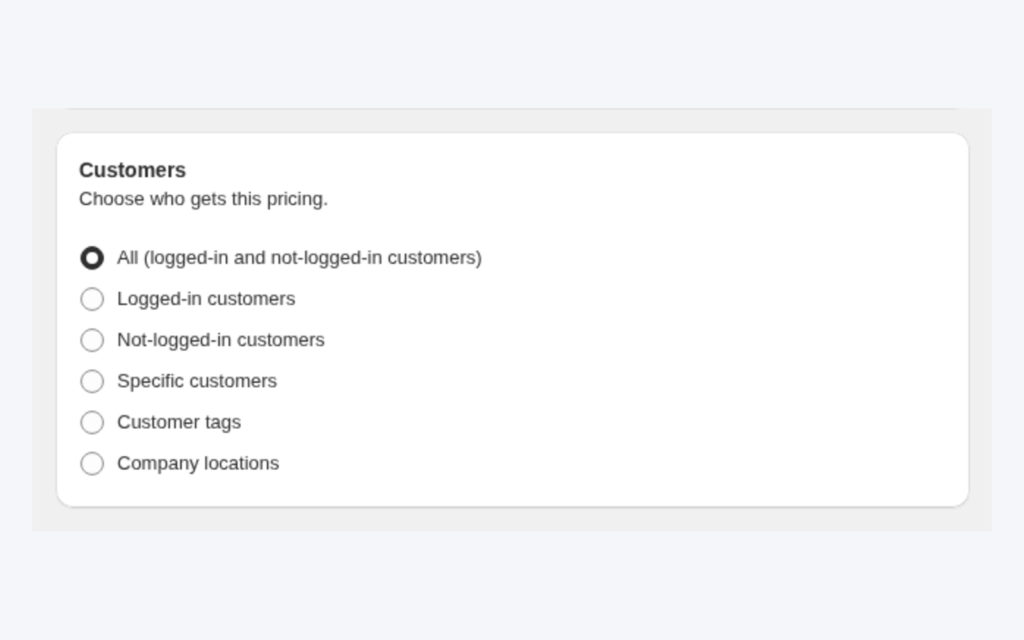
- The table appears only for matching customers. A guest does not match a rule for logged-in customers, so test as the right buyer.
- Collection pages are off by default. Tick Collection page in Settings. If it is ticked and still missing, your theme may need the table added manually; contact support with the theme name.
- Quick view and featured product sections can behave the same way on themes that build their own cards.
- The app embed must be on in the live theme, and the module must be switched on under B2B Pricing.
- One table per product on collection pages. If several rules apply, the rule with the lowest priority number is used.
- Long tables on small screens. Many ranges need more room on a phone, so test on mobile and trim rows if the table pushes Add to cart out of sight.
- Rule conditions still apply. The product must be in scope, not excluded, and the schedule must be running.
- Save again if it still fails. Opening the rule and clicking Save re-publishes the rules to the storefront.
- Automatic Shopify discounts do not work together with Volume Pricing.
Setup checklist
- Create or confirm at least one Volume Pricing rule.
- In Settings, tick the pages where the table should show.
- Pick the product-page position that suits your theme.
- Choose the table style and check the preview.
- Set Row click to minimum or maximum quantity.
- Add translations for each language you publish.
- Test as an eligible buyer on desktop and mobile.
- Run Storefront setup if a page does not show the table.
Plans and requirements
The Volume Pricing table and its Settings are part of the Volume Pricing module. Volume Pricing runs on every plan, in a limited form on Free: the storefront uses only your newest rule, which must be a quantity-based rule without market, variant, collection or tag conditions. Paid plans add more rule options, including a translation and preview table. See the BSS B2B Solutions pricing page for current plan details.
You can install BSS B2B Solution from the Shopify App Store (4.9 rating from 1,185 reviews as of 2026-10-02, 14-day free trial on paid plans), read the app overview, or follow the Volume Pricing settings guide. If the table does not appear, see why volume pricing tables do not show on collection pages.