Shopify B2B Setup Checklist: 10 Steps From Install to First Wholesale Order

Set up Shopify B2B in ten steps: choose how you identify buyers, check Shopify requirements, install the app, build a registration form with approval and a tag, add price, order and tax rules, add access tools, then test as a buyer. Each step below ends with a check.
BSS B2B Solution is free on development stores, so you can build and test every rule before you pay. Paid plans have a 14-day trial.
Install BSS B2B Solution See pricingLast updated October 4, 2026. Shopify facts come from the Help Center pages linked in the text, read on that date. BSS B2B Solutions makes BSS B2B Solution, Lock and Quote, the apps in the screenshots. The complete guide to Shopify B2B has a short setup section; this page is the hands-on version with a test for every step. Start there if you want the big picture first.
Key takeaways
- This checklist follows Shopify’s setup checklist for blended B2B stores and adds the app steps Shopify leaves to third parties: applications, tag price rules, order rules, tax display, quick order and hidden prices.
- Work on a duplicate theme with a test customer first.
- Order matters: embed, form, approval and tag, then price, order and access rules. Later steps read the tag.
- Several rules run in the cart, not in Shopify checkout. Test a direct checkout URL.
The Shopify B2B setup checklist at a glance
| # | Step | Where | Done when |
|---|---|---|---|
| 1 | Choose store type and how you identify buyers | Planning | You can say whether buyers are companies, tagged customers or both |
| 2 | Check Shopify requirements and duplicate your theme | Shopify admin | Customer accounts on, test theme exists |
| 3 | Install BSS B2B Solution and turn on the app embed | Shopify admin, app | Embed shows On in the theme editor |
| 4 | Build and publish the registration form | Registration Forms | A test application appears in the list |
| 5 | Set approval and the tag | Registration Forms | Approving a test account adds the tag |
| 6 | Create a price rule for the tag | Custom Pricing | Tagged test buyer sees the price, guest does not |
| 7 | Add order rules and payment terms | Order Limits, Net Terms | Cart blocks a too-small order; Pay later shows (Advanced and up) |
| 8 | Decide how tax is shown and handled | Tax Display, Tax Exempt | Test buyer sees the intended prices |
| 9 | Add access and ordering tools | BSS B2B Lock, BSS B2B Quote | Guest sees a login prompt; buyer can quick order |
| 10 | Test as a buyer, place the first order, invite buyers | Storefront | A test order reaches Orders or Draft orders |
Step 1: Choose your store type and how you identify buyers
Shopify’s first decision is store type. A blended store serves D2C and B2B customers from one admin. A dedicated store can be gated to B2B customers, and a blended store “can’t be gated to only B2B customers, because your D2C customers couldn’t place orders” (Shopify Help Center). If you stay blended and want to hide prices from guests, you need a lock (step 9).
Then decide how a buyer is recognized: a Shopify company with locations, a customer with a tag, or both. Read Shopify companies and catalogs vs customer tags before you choose.
- ☐ Store type chosen (blended or dedicated).
- ☐ Buyer model chosen (companies, tags or both) and the tag name written down, for example
wholesale.
Step 2: Check the requirements and duplicate your theme
Check three things in Shopify. First, plan: companies, locations, quantity rules, net terms and the quick order list are on Basic, Grow, Advanced and Plus, while direct company catalogs, deposits and partial payments are Plus only (plan table). Second, customer accounts: “You must activate customer accounts. You can’t use legacy customer accounts for B2B orders and customers” (Shopify Help Center). Third, incompatible features: accelerated checkouts such as Shop Pay and Apple Pay, local delivery, pickup points, tipping and subscriptions do not work with B2B orders.
Then protect your live store. In Online Store, Themes, open the menu on your theme and choose Duplicate. The copy is named “Copy of” plus the theme name, and Shopify allows no more than 20 themes (Shopify Help Center). Build and test on the copy. Our theme compatibility checklist goes deeper.
- ☐ Plan supports the B2B features you need.
- ☐ New customer accounts active.
- ☐ Duplicate theme created and named, for example “B2B test”.
Step 3: Install BSS B2B Solution and turn on the app embed
Install BSS B2B Solution from the Shopify App Store. All features are free on development stores, and paid plans have a 14-day trial. On a live store the Free plan is limited, for example to one Custom Pricing rule, so check the pricing page.
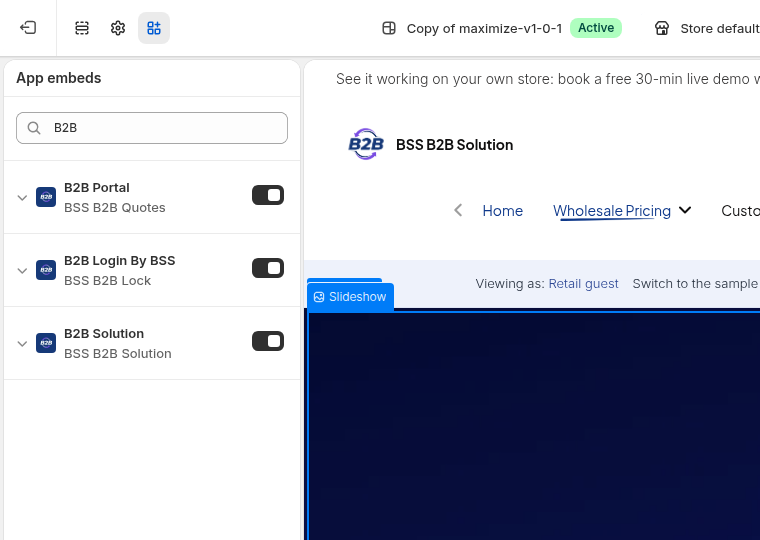
Everything on the storefront loads from one app embed. If it is off, nothing appears, even when rules are saved. Open the theme editor from the app home, find B2B Solution under App embeds, switch it on and save. Do this on the duplicate theme too (guide).
- ☐ App installed on the plan you need.
- ☐ App embed On in the test theme (and later in the live theme).
Step 4: Build and publish the registration form
A registration form turns visitors into applicants. In the app open Registration Forms and build the form: text, dropdown, file upload, date and checkbox fields are available, and tax ID fields for EU VAT, UK VAT, US EIN, ABN and India GST. Each uploaded file can be up to 10 MB. Ask only for what you need to approve a buyer. Our registration form guide covers fields and layout.
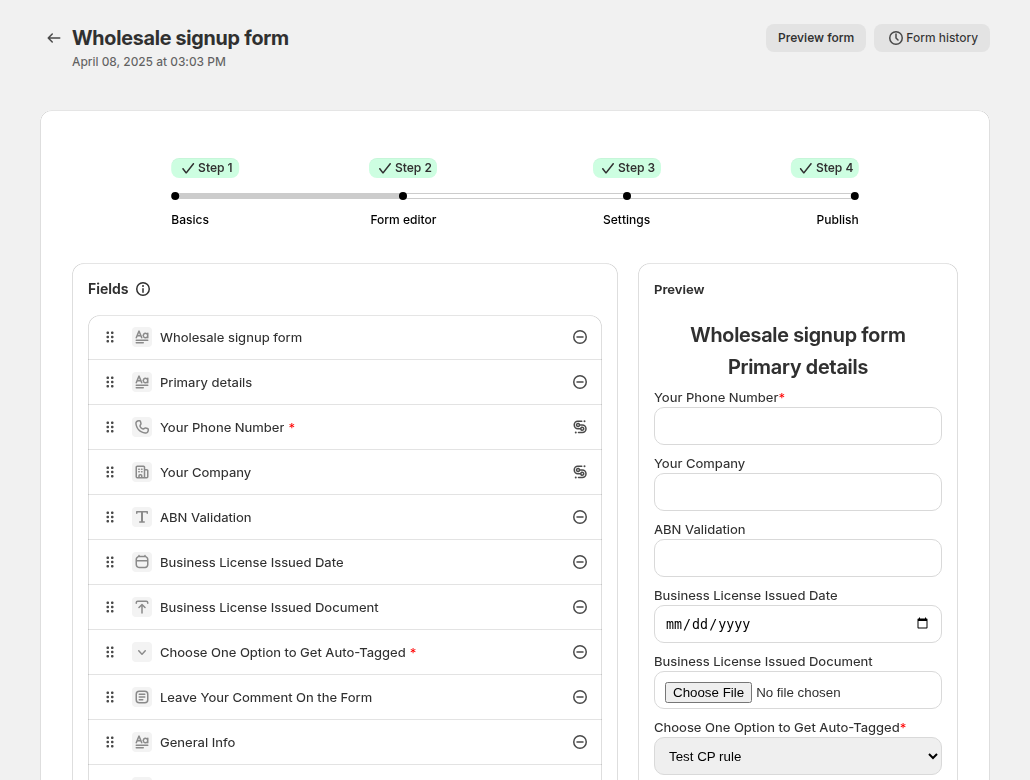
Publish the form on a page with the app block or the shortcode. The tax ID check runs live as the buyer types and blocks submit only when the field is required. We found no second check on the server, so verify numbers before approval. See the form builder guide.
- ☐ Form fields chosen, including tax ID if you need it.
- ☐ Form published on a page and linked from your menu or a lock message.
- ☐ One test application submitted from a private window.
Step 5: Set approval and the tag
In the form settings choose manual or automatic approval and the emails to send. Manual approval is the safer default for a new program. Enter a tag in Assign tag when customer is approved. Every later step reads this tag.
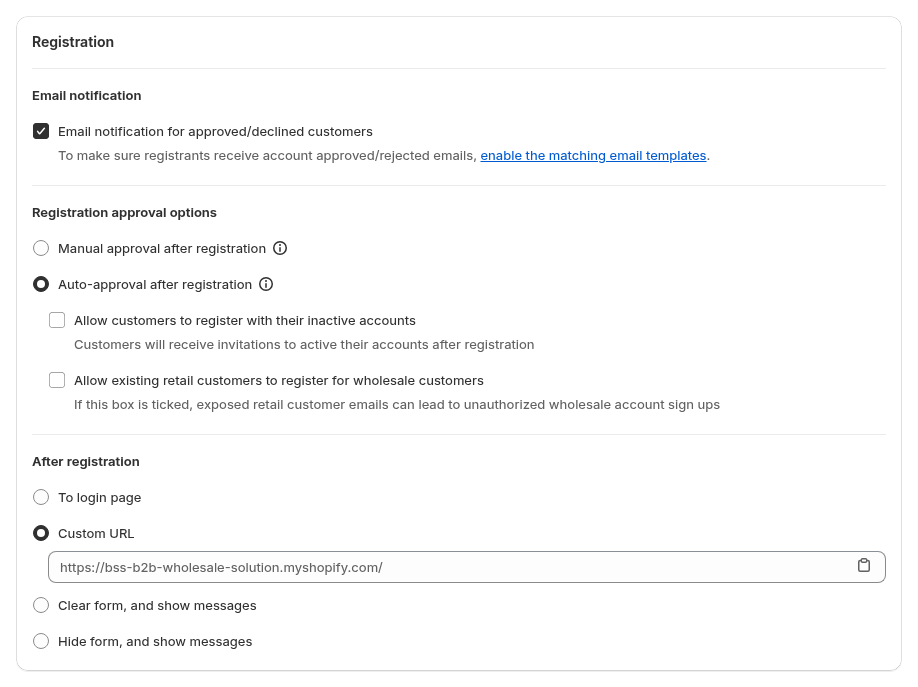
Approval creates or updates a Shopify customer. It does not create a Shopify company, so add one yourself if you need native catalogs. Auto Tags does not tag existing customers retroactively. See the use case wholesale registration form with approval shows the full flow.
- ☐ Approval mode set and emails reviewed.
- ☐ Tag entered. Approve the test application and confirm the tag on the customer profile.
Step 6: Create a price rule for the tag
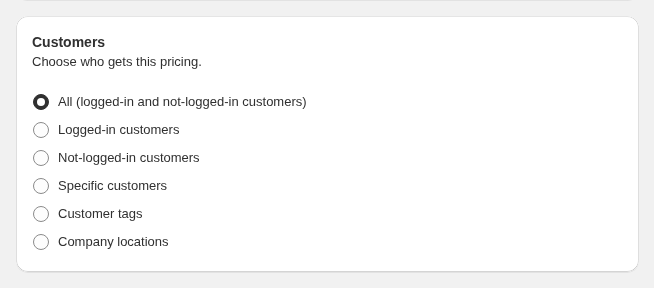
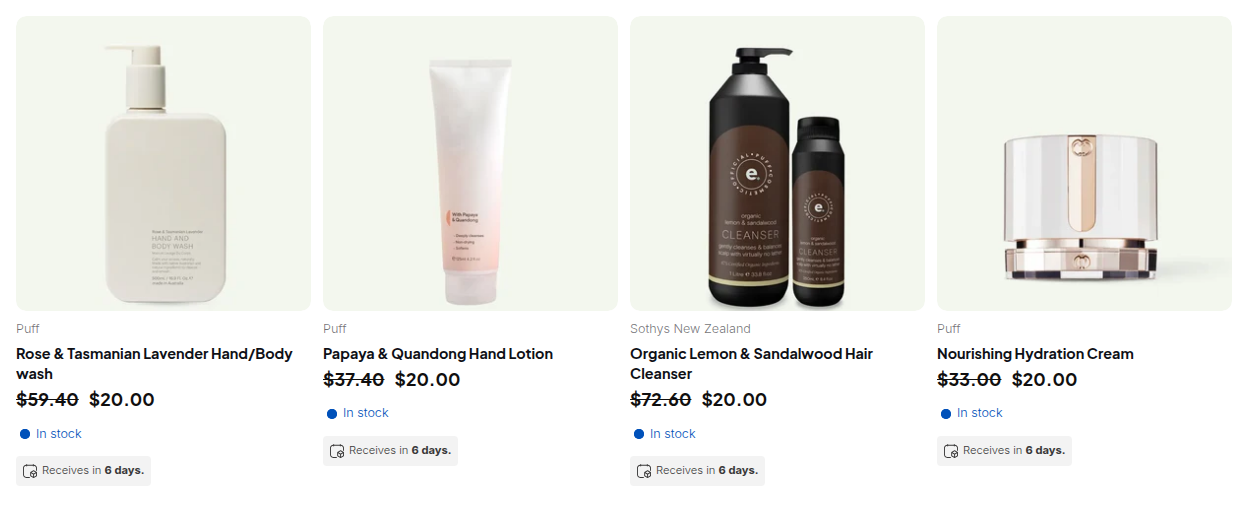
Open Custom Pricing, add a rule, set Apply to customers to Customer tags, enter your tag, choose the products and pick a price adjustment, for example a percentage decrease. A tag matches logged-in customers with at least one of the tags you enter, in any capitalization. How customer targeting works lists every option.
When rules of the same type overlap, the lowest Priority number (0 to 99) wins. Price Lists need the Platinum plan and are app-owned, not Shopify catalogs. See wholesale price by customer tag and the wholesale pricing hub.
- ☐ Rule saved and enabled, audience set to your tag.
- ☐ Test customer with the tag sees the price in a private window. A guest sees retail.
- ☐ If prices do not show, read why Shopify B2B prices are not showing.
Step 7: Add order rules and payment terms
Shopify has native quantity rules for companies. BSS adds order limits and quantity increments for tagged buyers, on the Advanced plan and up. Start with one minimum order amount for the wholesale tag. See enforce a minimum order quantity and value.
Shopify’s native payment terms hang on a company location and are on all four plans (Shopify Help Center). BSS Net Terms adds a Pay later button for tagged buyers, with no Net 45 and no credit limit. Our Net 30 guide covers both.
Test the bypass. Order limits, Net Terms and Tax Exempt work from the cart page, and a direct checkout link skips them. If that matters, save Net Terms orders as drafts for review.
- ☐ Minimum order rule added and shown in the cart for an under-minimum test cart.
- ☐ Payment terms decided: native, BSS Net Terms or invoice by hand.
- ☐ Direct checkout URL tested and its behavior written down.
Step 8: Decide how tax is shown and handled
BSS Tax Display changes only what prices show, for example excluding VAT for businesses, and Shopify still calculates tax at checkout. Tax Exempt lets a buyer enter a tax ID on the cart page so the order is created without tax (Advanced and Platinum plans). This is not tax advice: check local rules. Follow how to show prices excluding VAT to businesses and the tax and compliance hub.
- ☐ Tax display decided for retail and for the wholesale tag.
- ☐ If you use exemptions: a tax ID box on the cart page and one test order checked line by line.
Step 9: Add access and ordering tools
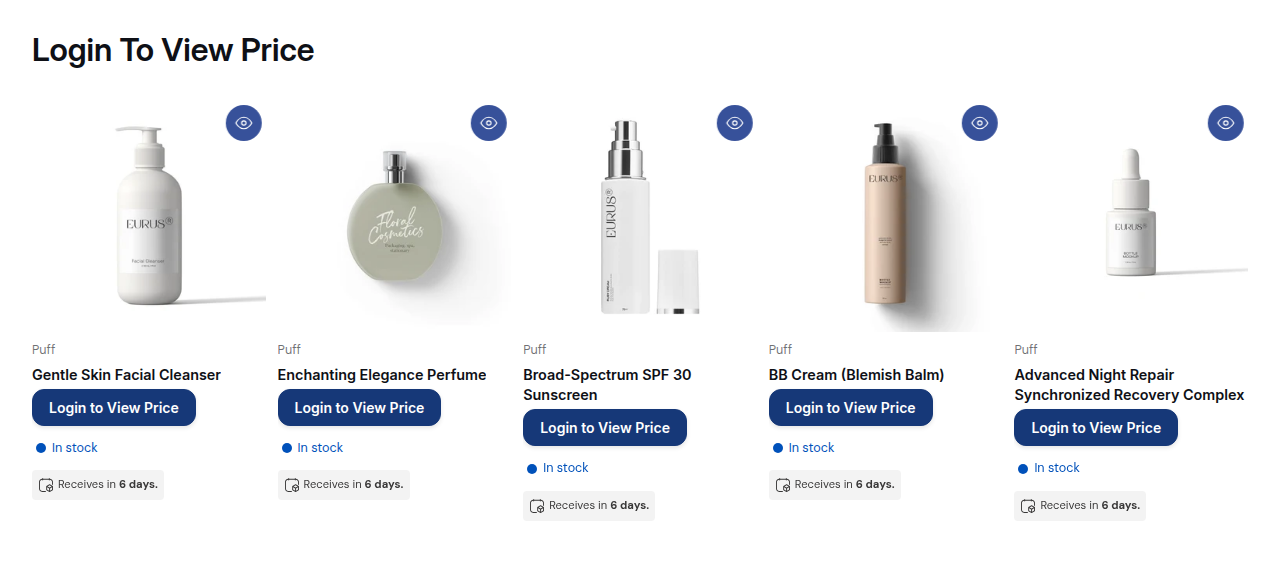
Hide prices from guests. BSS B2B Lock can replace prices and Add to cart with a login prompt, or lock products, collections and pages by tag. Lock writes code into your theme, so install it on the duplicate theme first. Treat every lock as a visibility control, not a security guarantee. See hide wholesale prices from guest visitors and the access control hub.
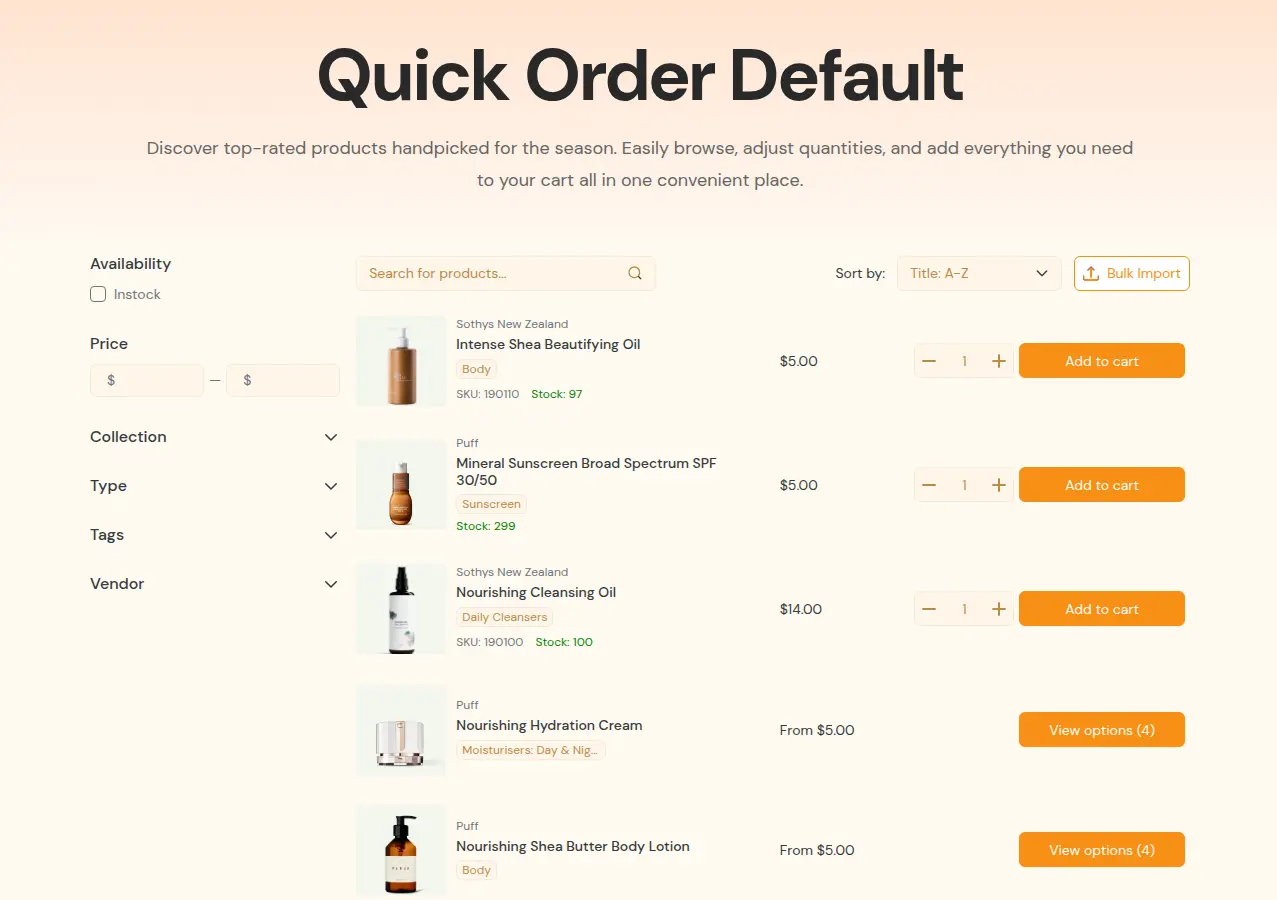
Quick order. Shopify includes a quick order list on all four plans. BSS B2B Quote adds a Quick Order page for Online Store 2.0 themes with CSV or XLSX upload. Publish one page and link it from your wholesale menu. See standard quick order pages and Shopify quick order form.
- ☐ Lock rule installed on the test theme: a guest sees the login prompt, a tagged buyer sees prices.
- ☐ Quick Order page published and visible to the right customers.
Step 10: Test as a buyer, place the first order and invite buyers
Shopify advises creating a test customer and logging in before you invite buyers: set up a test company with a location, optionally use Shopify’s test payment gateway, place a test order and check pricing, payment terms and checkout settings (Shopify Help Center). On the tag model, give the test customer your tag.
- Open a private window as a guest. Check prices, the lock and the form.
- Sign in as the tagged test customer. Check the price, the minimum, tax display and Quick Order.
- Place the order. Confirm it in Orders or, if you chose drafts, in Draft orders.
- Repeat on mobile and with the cart drawer if your theme uses one.
- Publish the test theme, or copy your changes to the live theme, and turn the app embed on in it.
- Invite your first buyers. Watch the first applications and orders by hand.
What this checklist does not cover
- Plan details change. Confirm in the Shopify Help Center and the BSS pricing page.
- Headless storefronts. We found no headless support documented for the apps, so test before you assume it.
- Legal and tax advice. Tax and registration steps are tools, not compliance guarantees.
Shopify B2B setup: frequently asked questions
What is the first step to set up Shopify B2B?
Decide the store type and how you identify buyers. Shopify’s checklist starts with companies and locations, and a tag-based setup starts with a registration form that tags approved buyers.
Do I need Shopify Plus to set up B2B?
No. Companies, locations, quantity rules, net terms and the quick order list are available on Basic, Grow, Advanced and Plus. Direct company catalogs, deposits and partial payments are Plus only. Check the Help Center because plans change.
How long does Shopify B2B setup take?
It depends on your catalog size, price groups and tax cases, so we give no fixed time. Treat the checklist as a test plan, not a countdown.
Do I need to duplicate my theme before installing B2B apps?
It is strongly advised. Some apps add blocks or write code into the theme. Test on a copy, then publish it or repeat the setup on the live theme. Each theme has its own app embed switch.
Does BSS approval create a Shopify company?
No. Approving an application creates or updates a customer and can add a tag. Create companies yourself if you need native catalogs or per-location terms.
Why do some rules not apply at checkout?
Order limits, Net Terms and Tax Exempt work from the cart page, so a direct checkout URL skips them. Test it and add a manual review where it matters.
Next steps
Work through the ten steps on a development store first. Then read the customer onboarding hub and the order rules and terms hub. The use case run a B2B-only store with all three apps shows the whole flow. The glossary explains blended store and new customer accounts.
Install BSS B2B Solution, add Lock for hidden prices and Quote for quick order and quotes, and test every step with a test customer.
Install BSS B2B Solution See the appSources
Shopify pages read on October 4, 2026. BSS facts: BSS B2B Solution user guide at docs.bss-b2b.solutions, our October 2026 review of the apps’ behavior, and the Shopify App Store listings (as of October 4, 2026).
- Shopify Help Center: Setup checklist for blended B2B stores
- Shopify Help Center: Requirements and considerations for using B2B
- Shopify Help Center: Shopify B2B features by plan
- Shopify Help Center: Test the B2B customer experience
- Shopify Help Center: Blended and dedicated B2B stores
- Shopify Help Center: Duplicating themes
- Shopify Help Center: B2B payment terms
- BSS B2B Solution user guide: Set up your first rule
- BSS B2B Solution user guide: Enable the app embed
- BSS B2B Solution user guide: Give tagged customers special prices
You may also like

How to Uninstall a Shopify B2B or Lock App Safely: Remove Leftover Theme Code
Some Shopify apps leave code in your theme after you uninstall them. To remove a B2B or lock app safely, duplicate your […]

Shopify Markets and B2B Pricing: Wholesale Prices Per Country and Currency
Shopify Markets control currency, languages and taxes by audience, and B2B catalogs can be assigned per B2B market, with a cap on […]

How to Collect and Validate a Tax ID (EIN, ABN, GST, UK VAT) on Shopify
Shopify has a Tax ID field on company locations, but the pages we read describe no check against a tax register. BSS […]