To tag Shopify customers automatically by spend or order count, create an Auto Tags rule in BSS B2B Solution: pick an order event, set a condition such as Total spent, and add the customer tag you want. Pricing, access and payment-term rules that target that tag then apply without anyone editing the customer by hand.
This page is for distributors and wholesalers who run price tiers such as wholesale, silver and gold, and want buyers to move between them as they order. It explains the events, conditions and actions that Auto Tags supports, the limits you should know before you trust a rule, and a worked example with illustrative numbers.
Who this is for
Auto Tags is worth setting up if:
- You sell to a few hundred accounts and promoting a buyer to a better tier is currently someone’s weekly chore.
- Your price tiers are driven by customer tags, so the tag decides the price.
- You want to label new sign-ups by country, company domain or a registration answer without opening each record.
- You want to mark orders (for example “priority” or “heavy”) so your warehouse can filter them.
- You want a record of which rule tagged which customer.
- You run a distributor or reseller network and want loyalty tiers based on how much a buyer actually spends.
Why this matters
Tiered pricing only works if tags are right. If a person has to promote buyers by hand, someone will forget, and a customer who spends more every month keeps paying the starter price. They notice, and they ask why a smaller competitor gets a better price. A distributor that rewards volume on paper but not in the cart weakens its own offer. Tagging by hand also stops scaling once you have hundreds of accounts, because every tag is a small decision that has to be made at the right time by the right person.
For the buyer, the effect is trust. A dealer who sees the price improve right after reaching a volume milestone learns that your program is fair and predictable, and that is a reason to consolidate more orders with you. For your team, it replaces a recurring reporting chore with a rule that runs on every order.
Wrong tags have the opposite cost. A buyer who keeps a high-tier tag after their volume drops is a margin leak. So tagging is not only about adding labels, but about doing it consistently.
Picture a bicycle-parts distributor with three tiers: wholesale, silver and gold. Dealers start at wholesale. The owner wants a dealer to reach silver after a certain amount of paid orders in a quarter, and gold after more. Without rules, the owner checks a report every Friday and edits customers one by one. With Auto Tags, the rule fires on each paid order and the tag changes by itself. ORQA, a Croatian FPV technology brand, uses Auto Tag together with a registration form, tag-based pricing and order limits to manage its reseller network; see the ORQA case study.
What Shopify covers natively, and where an app helps
Shopify lets you add tags to customers and orders by hand, and the built-in B2B features described on the B2B features by plan page focus on companies, catalogs, payment terms and quantity rules. They do not turn spend or order count into a price tier for you. The Shopify B2B guide compares native B2B with apps in more detail.
Auto Tags in BSS B2B Solution connects those pieces. It watches Shopify events, checks your conditions and writes tags. Because Custom Pricing, Price List, Volume Pricing, Net Terms and BSS B2B Lock all read tags, one rule can change what a buyer pays, which terms they get and which pages they see. The customer onboarding hub shows where Auto Tags sits next to registration forms.
How to set it up with BSS B2B Solution
1. Turn on Auto Tags and add a rule
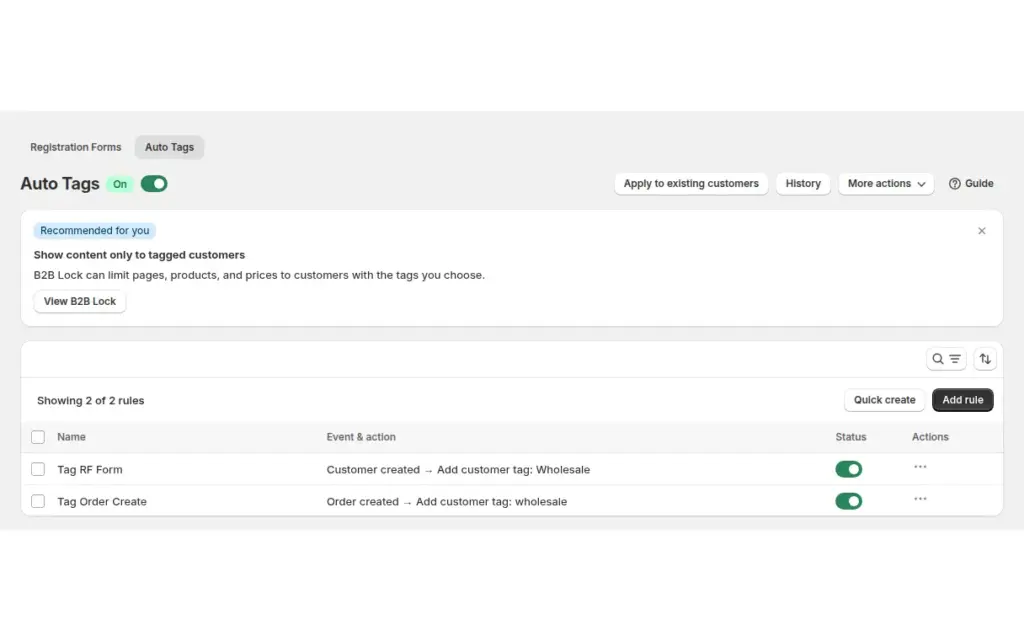
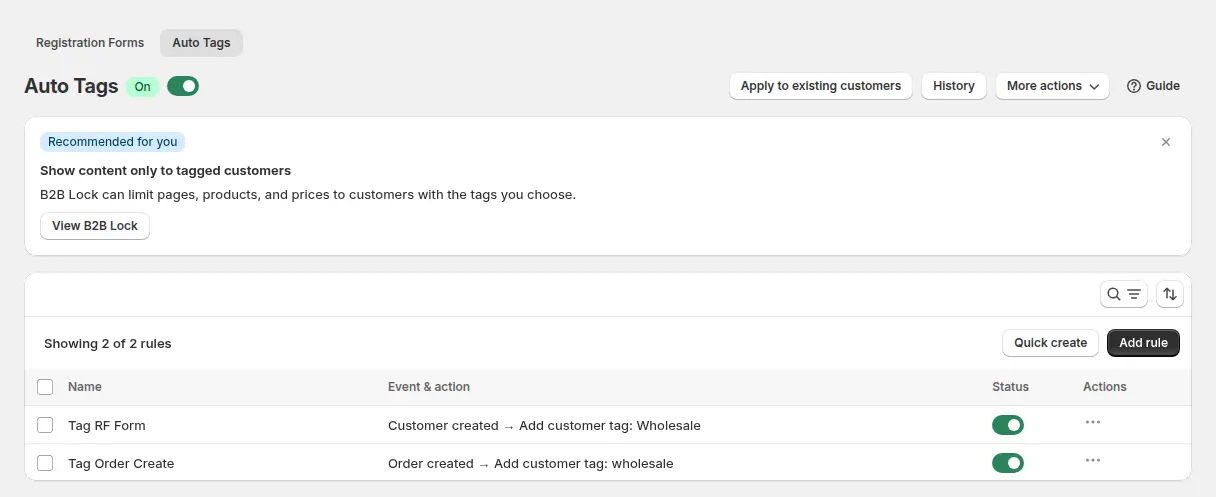
Go to B2B customers > Auto Tags, switch the module on and click Add rule. The page lists each rule with its event, its action and an on/off switch.
2. Choose the event
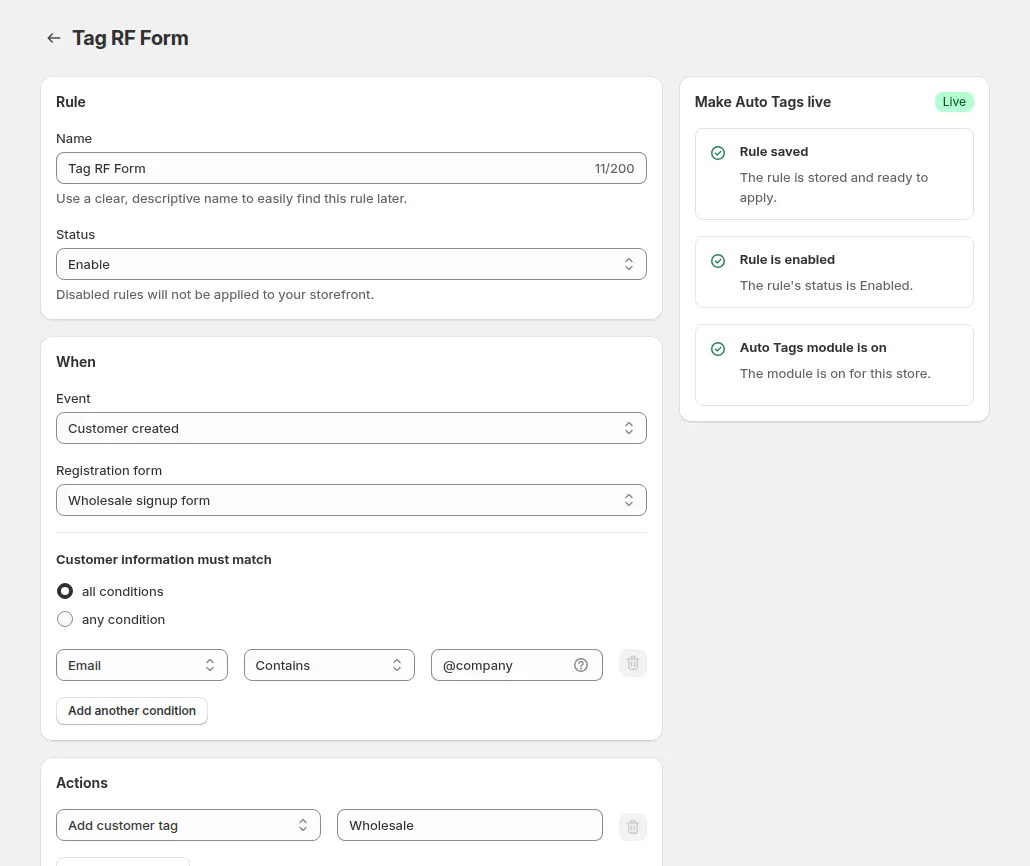
Give the rule a name and choose one event: Customer Created, Order Created, Order Paid, Order Fulfilled or Order Canceled. Customer Created works on registration form fields, so you can tag by country, email domain or a custom answer. The order events can check Total spent, the customer’s order count, order amount, order quantity, products and more. For spend and order-count conditions, use Order Paid or Order Created.
3. Set the conditions
Decide whether a record must match all conditions or any condition, then add rows. Text fields use Contains, Does not contain, Is equal to and Is not equal to; number fields use Is equal to, Greater than and Less than. Total Amount of Paid Orders and Total Number of Paid Orders look back 1, 7, 15, 30, 45 or 60 days, which is how you build “spent this much in the last 60 days” tiers.
4. Add the actions
Add one or more actions: add a customer tag, remove a customer tag, add a customer note, add or remove an order tag, or add an order note. Customer Created rules can also mark the customer tax exempt, once per rule. Enter several tags separated by commas.
5. Point your pricing rules at the tag
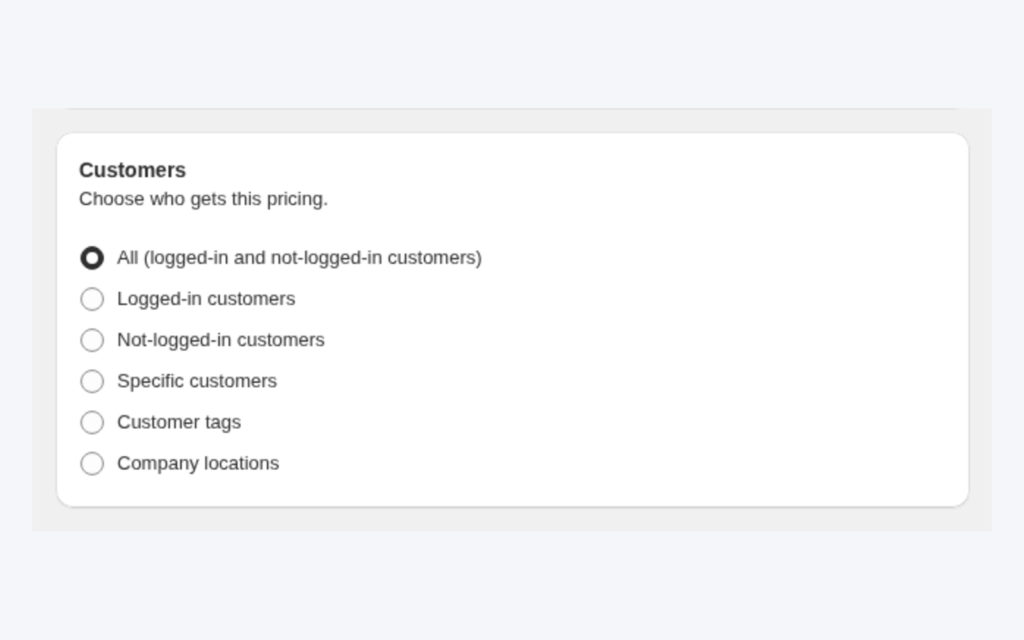
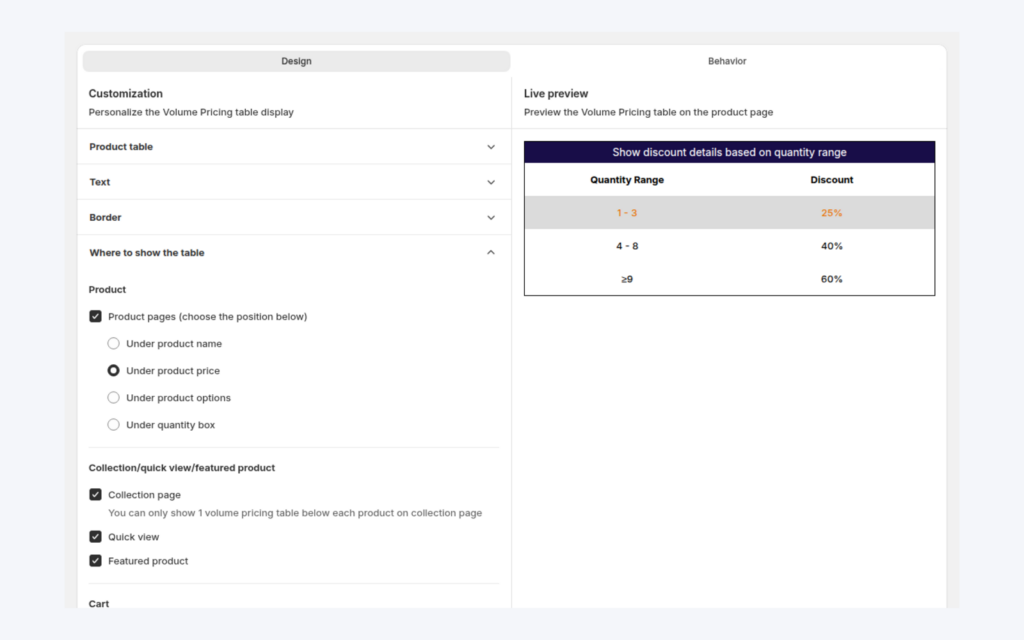
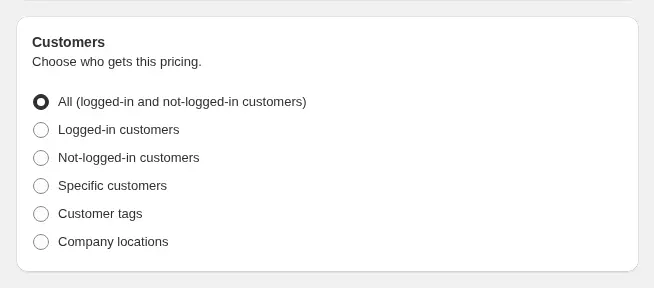
Create a Custom Pricing, Volume Pricing or Net Terms rule that targets the same tag, so the new tier applies once the tag is added and the customer’s page reloads. In the rule’s Customers card, choose customer tags and enter the tag.
6. Backfill existing customers and check History
Rules fire on new events, so run Apply to existing customers once to tag buyers who already exist. Open History to see each rule, the tags it added or removed, and when.
7. Verify on the storefront
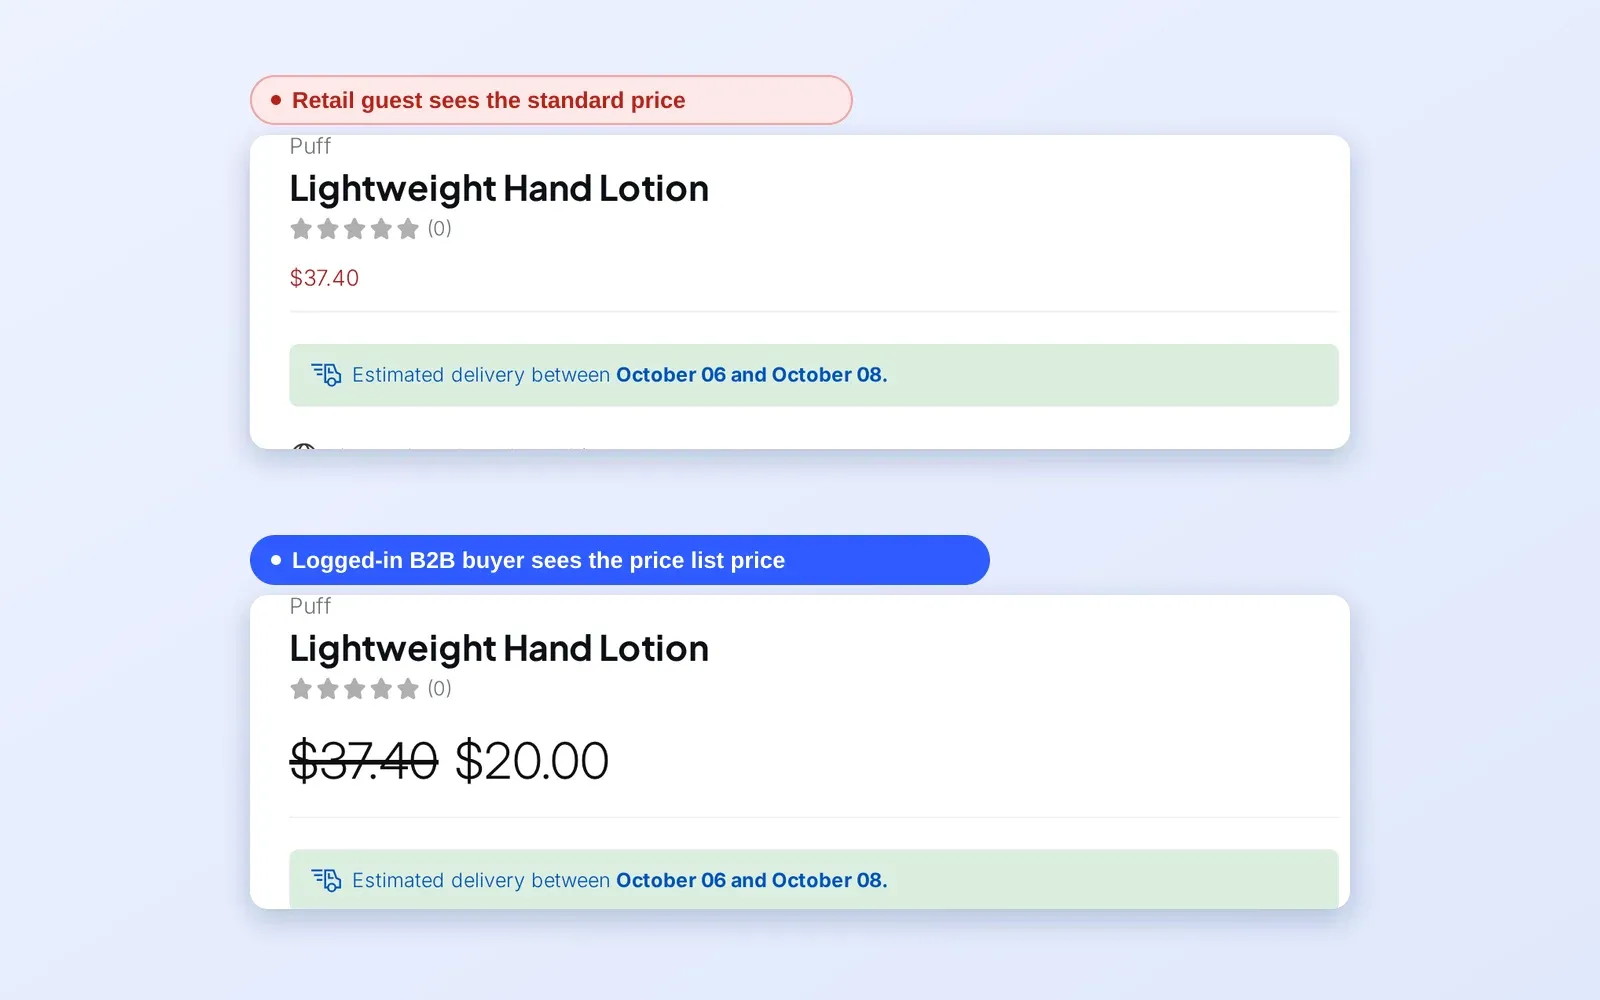
A guest or untagged customer sees the retail price.
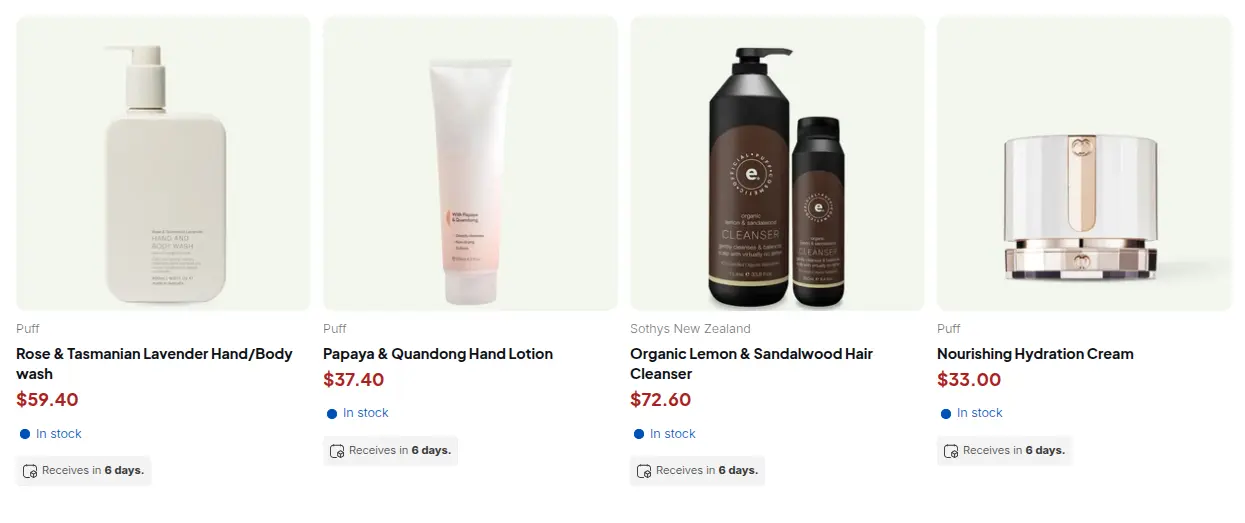
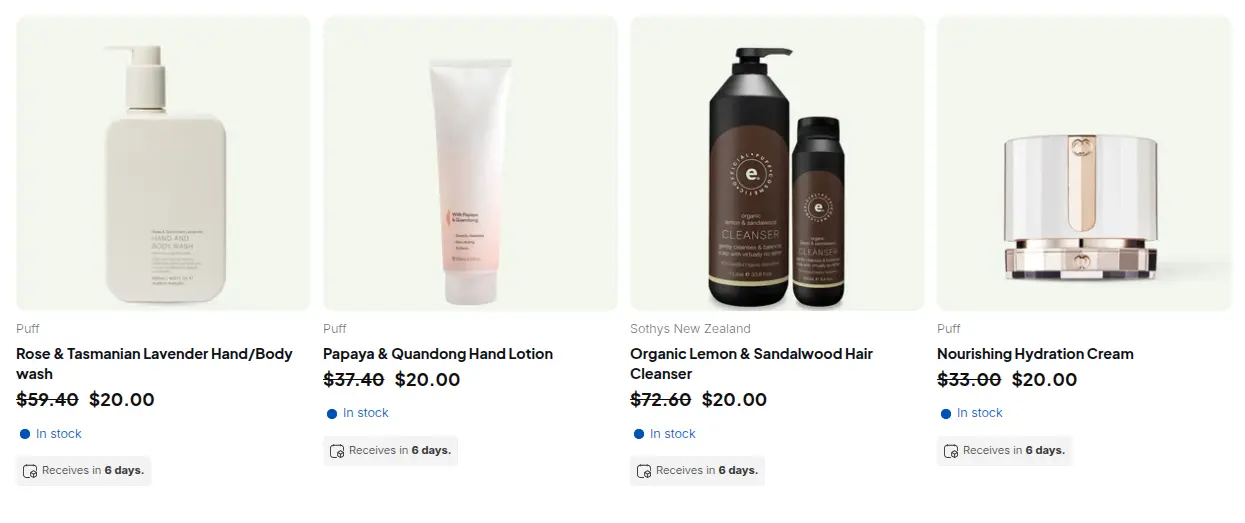
Once the tag is added, the same collection shows the tagged price.
Four rule recipes to copy
These patterns come up most often in wholesale stores. Adapt the tag names to your own.
- Tag high-value customers. Event Order Paid, condition Order Amount greater than a threshold you choose, action add customer tag high-value. Good for a first loyalty tier.
- Classify partners at sign-up. Event Customer Created, condition Email contains your partner domain, action add customer tag partner. The Custom Pricing or lock rules for that tag then apply right away.
- Tag by country from the registration form. Event Customer Created, pick the registration form, condition Country is equal to the country code or name, action add a regional tag such as us-wholesale. Useful when regions have different prices or tax settings.
- Clean up on cancellation. Event Order Canceled, action remove order tag priority, so cancelled orders drop out of the picking list.
A tidy naming habit saves time later. Name each rule after its outcome (“Gold after 60-day spend”) rather than its mechanism, and keep one tag per tier so a single remove-tag action is enough when a buyer moves up.
Example
Example for illustration only, not a customer result. A bicycle-parts distributor sells a $40 brake kit at retail. Custom Pricing gives tag wholesale 15% off ($34), silver 20% off ($32) and gold 25% off ($30). New dealers get wholesale at registration through a Customer Created rule. Two Order Paid rules follow: if Total Amount of Paid Orders over 60 days is greater than $3,000, add silver; if greater than $8,000, add gold. A dealer who reaches $3,200 of paid orders in 60 days is tagged silver; from the next page load the brake kit shows $32. The owner opens History on Friday only to confirm the rules fired, not to edit customers.
Works well with
- Silver and gold wholesale tiers for the pricing side of a tiered program.
- Wholesale price by customer tag to see how tags drive Custom Pricing.
- Approve and notify wholesale applicants so the first tag is added at approval.
- Show products only to tagged customers to reveal a gold-only collection.
Useful terms: customer tag, tiered pricing and trade account. If you also hide content by tag, BSS B2B Lock reads the same tags.
Limits and common mistakes
- Existing customers are not tagged by themselves. A rule is evaluated when an event happens. Use Apply to existing customers to backfill. Only one bulk run per store can run at a time, and rules based on paid-order totals over a period are left out of it.
- A customer is not untagged automatically. When a buyer stops matching a rule, the tag stays. Removal needs a remove-tag action on an order event, or a bulk Remove.
- Greater than is strict. An order of exactly 500 does not match Order Amount Greater than 500. Test the boundary value on a sample order.
- Order’s item is not what it sounds like. It counts how many orders the customer has placed. For items in this order use Number of Products or Order Qty.
- Never leave a value empty. Contains with a blank value matches every record and could tag your whole store.
- Spend conditions run on order events only. Customer Created cannot check Total spent, and Customer Updated is not an event.
Setup checklist
- List your tiers and the tag name for each, in lower case and spelled once.
- Create a Customer Created rule that tags new sign-ups.
- Create Order Paid rules for each upgrade threshold, using the period fields you need.
- Add remove-tag actions if a buyer should lose a lower tier tag when they gain a higher one.
- Create pricing rules that target each tag.
- Test with one sample order per boundary value before you backfill.
- Run Apply to existing customers once, then read History to check the results.
- Keep the Auto Tags guide open while you configure.
Plans and requirements
Auto Tags is available on the paid BSS B2B Solution plans (Essentials $29, Advanced $49 and Platinum $99 per month, with yearly billing saving 10%), not on the Free plan. See the pricing page to compare plans, then get BSS B2B Solution from the Shopify App Store.